Initial Setup
After installing Vulnotes (either on-premise or via SaaS), the first thing you need to do is create your admin account.
Create your admin account
Navigate to your Vulnotes URL. On the first access, you will be redirected to the setup page where you create the initial administrator account.
Fill in your email address and choose a password (minimum 12 characters), then confirm it.
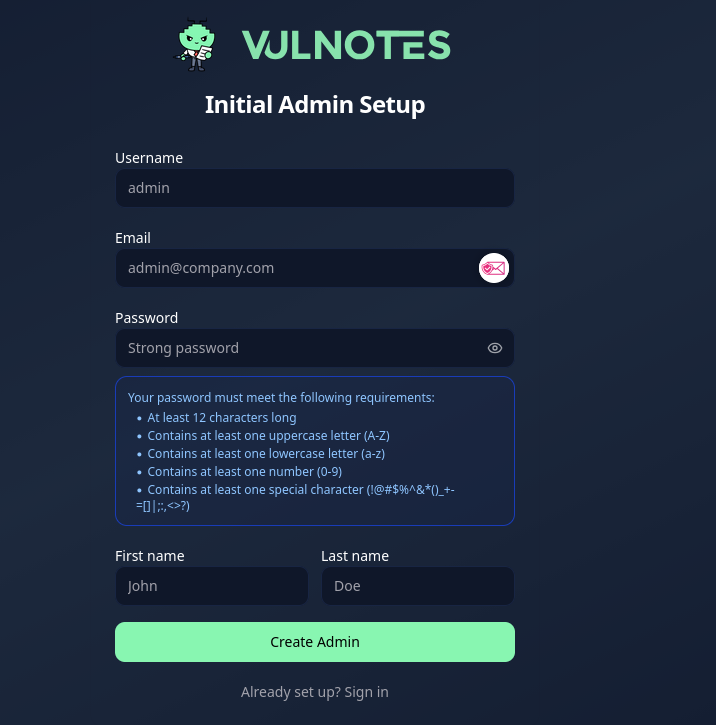
This account gets full admin privileges. You can create additional users after setup.
Add your team
Once logged in, go to Administration > User Management and click Add User to invite team members. Assign them a role (Admin or Pentester) based on what they need access to.
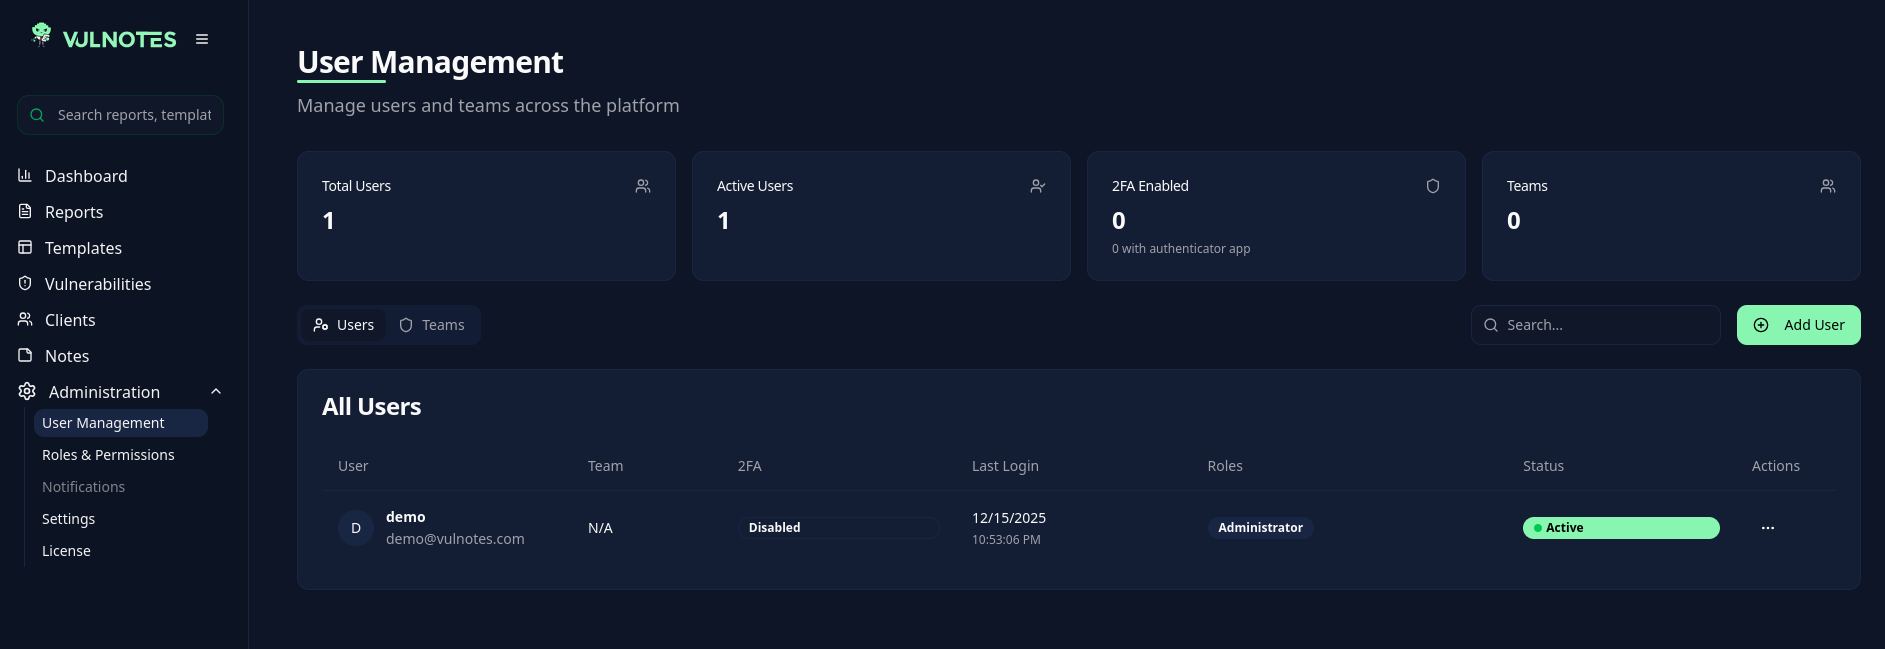
You can send invitations by email so users set up their own passwords, or create accounts directly with temporary passwords.
Import existing data
If you are coming from another tool, head to Administration > Settings > Import / Export to bring in your existing vulnerabilities, clients, and companies. Vulnotes supports importing from PwnDoc, Vulnotes archives, and a standardized JSON format that works with any source.
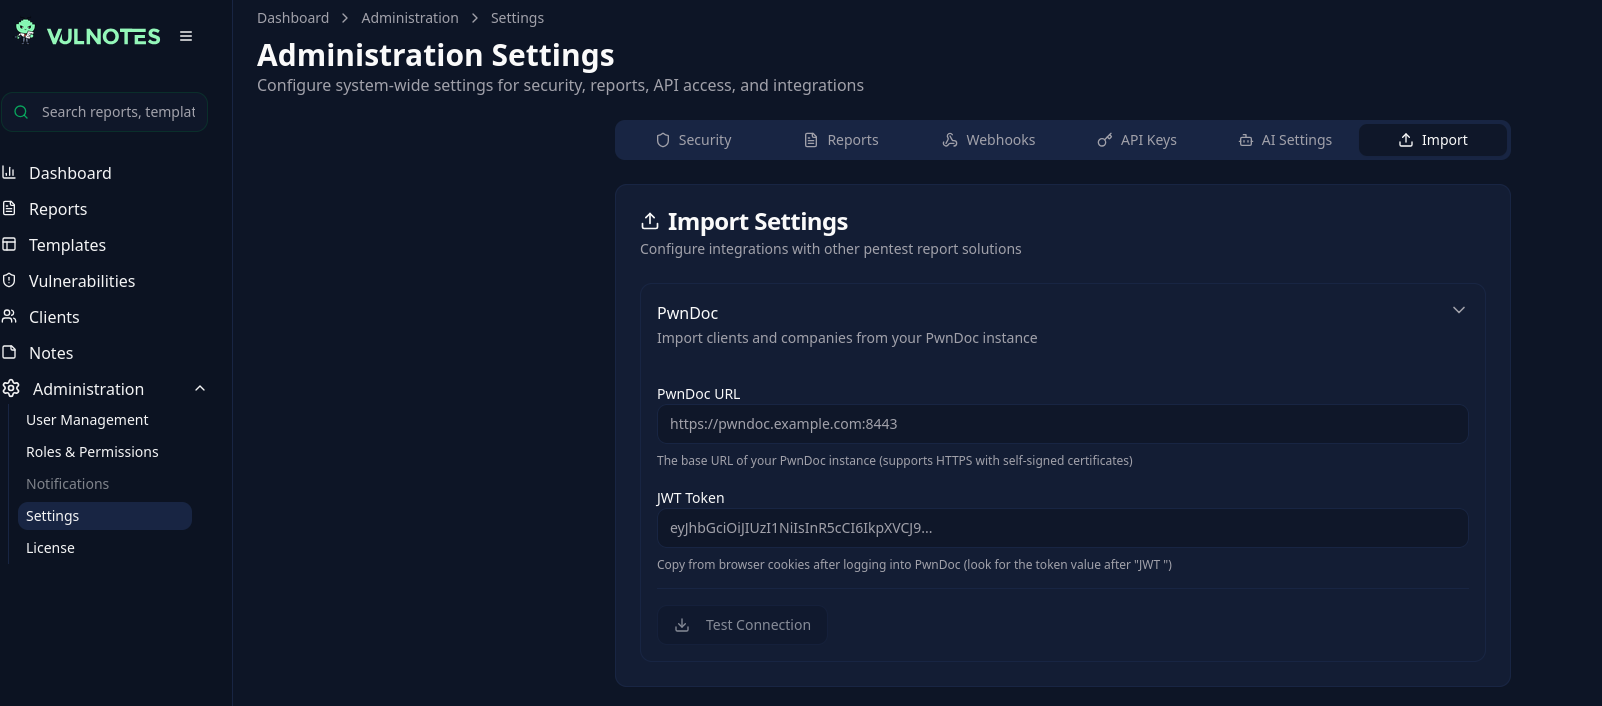
See the Migration & Import guide for an overview of all import options, or the full Import Data reference for JSON format details.
TIP
If your current tool is not listed as an import source, contact us at contact@vulnotes.com and we will add support for it.
Security recommendations
Before going into production, take a few minutes to harden your instance:
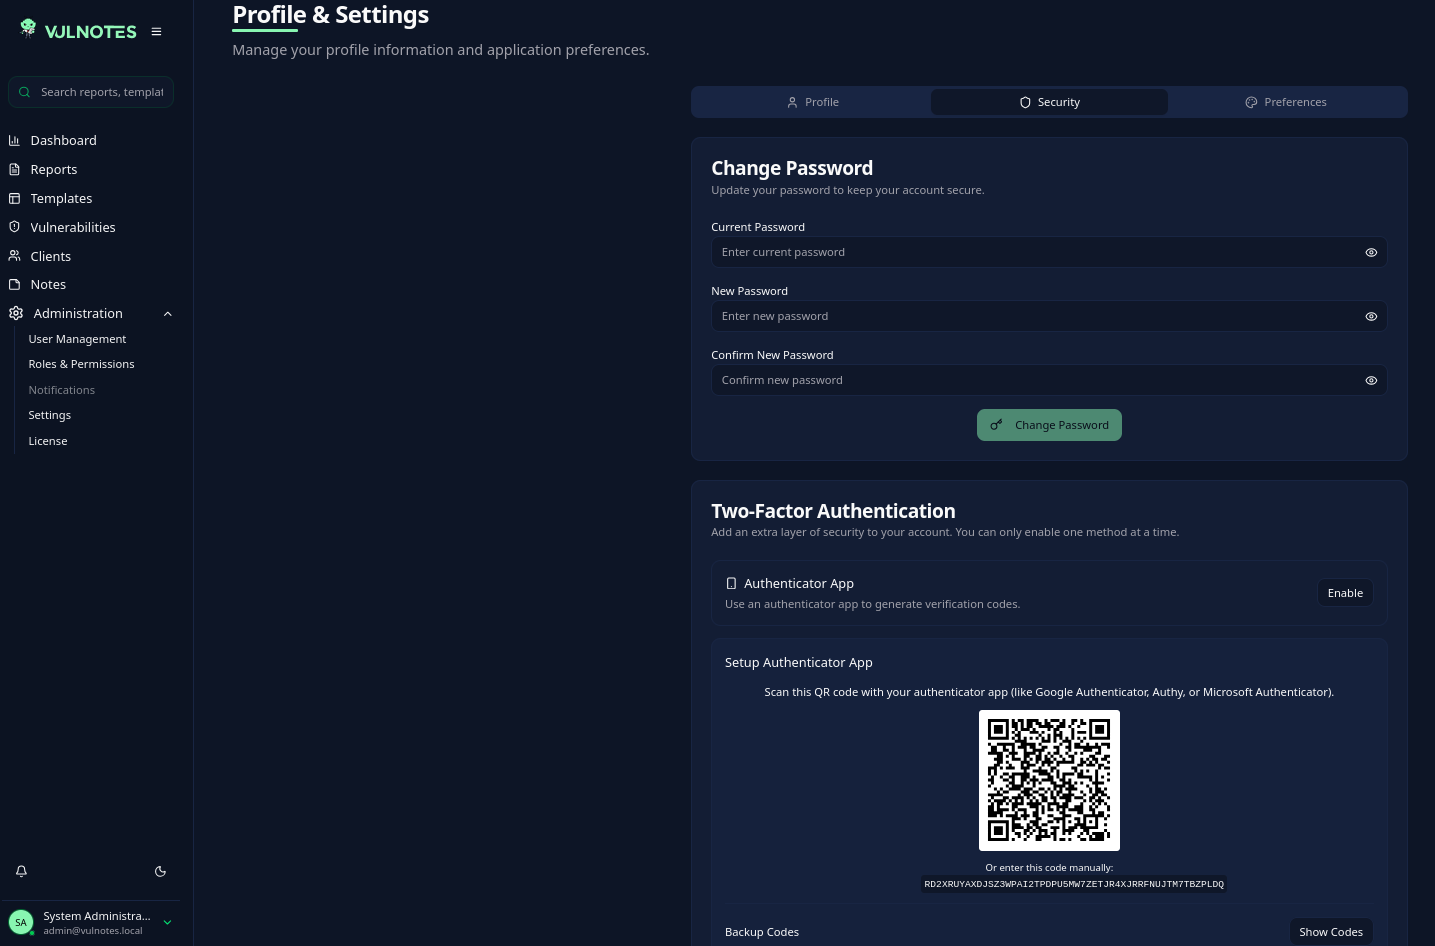
Enable two-factor authentication for your admin account. Go to Profile > Security, enable 2FA, and scan the QR code with your authenticator app.
Configure password policies in Administration > Settings > Security. Set minimum length, complexity requirements, and optionally a password expiration period.
Review role permissions in Administration > Roles & Permissions. Check that the default roles match your organization's access requirements and adjust as needed.
Next steps
- Report Sections & Content to start writing your first report
- Vulnerability Library to set up your vulnerability database
- Template Design to customize your report templates