Kill Chains
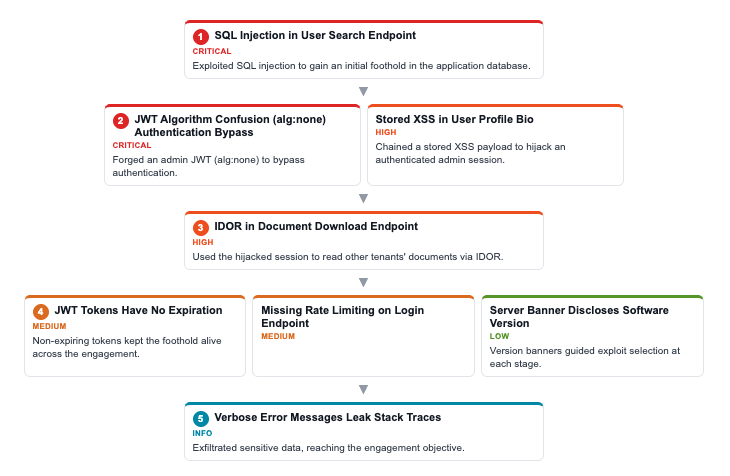
A kill chain turns your individual findings into a story: it shows, step by step, how an attacker chains vulnerabilities together to reach their objective. Instead of a flat list of issues, stakeholders see the path from initial access to impact.
A kill chain has two parts:
- A kill chain element placed in your report template, which draws the visual flow.
- The findings you flag as part of the chain, in the report itself. The element is filled with those findings when the report is generated.
Adding the kill chain element
Open a template in the editor and click Kill Chain in the toolbar. The element is inserted at full page width and shows a few placeholder steps so you can see what it will look like.
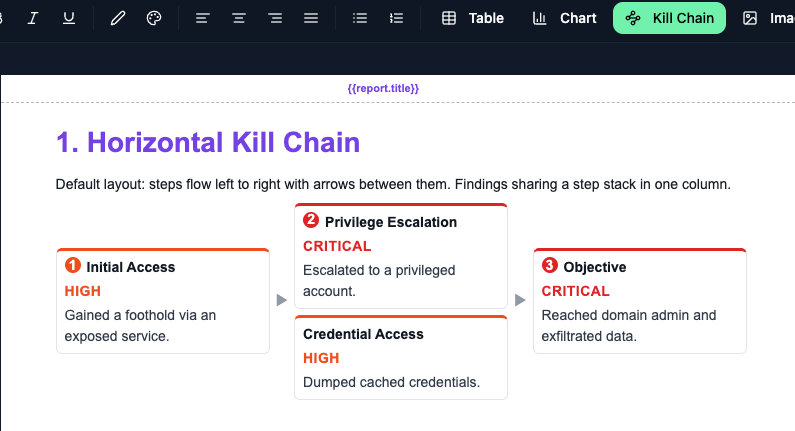
The placeholder steps are only shown in the builder. When a report using this template is generated, they are replaced by the report's real findings (see Building the chain below). There is no content to type into the element itself.
Customizing the design
Click the element to open its settings panel on the right.
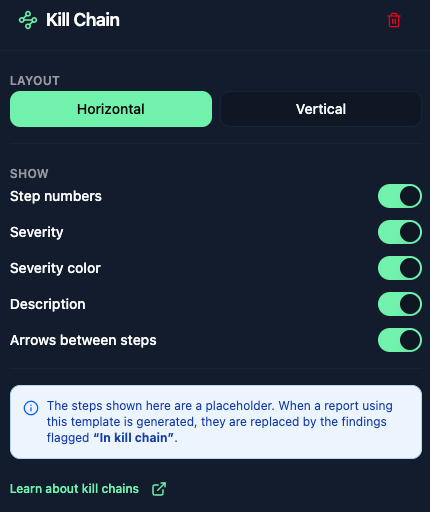
The available options are:
- Layout - Horizontal lays the steps out left to right (wrapping to a new line when they don't fit); Vertical stacks them down the page, centered.
- Step numbers - show or hide the numbered badge on each step.
- Severity - show or hide the severity label (HIGH, CRITICAL, ...) on each card.
- Severity color - color each card's accent (the top bar, badge and severity label) by severity. Turn it off for a neutral grey look.
- Description - show or hide the per-step description text.
- Arrows between steps - show or hide the connectors between steps.
Changes are applied to the element immediately. To remove the element, use the trash icon at the top of the panel.
Building the chain from findings
Open a report that uses a template containing the kill chain element, then go to the Findings tab. Each finding has an In kill chain toggle next to Completed.
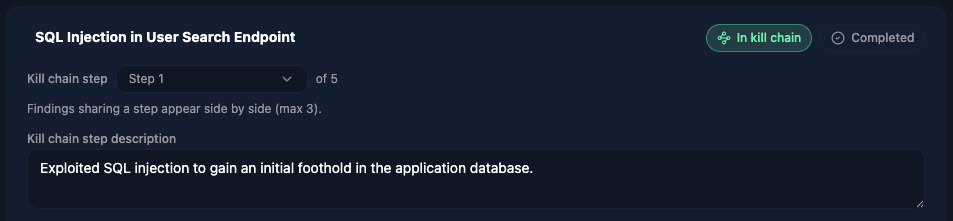
Turn In kill chain on to add the finding to the chain. When it is on, two extra controls appear:
- Kill chain step - the step this finding belongs to (see Steps).
- Kill chain step description - a short note describing this finding's role in the attack narrative, for example how it was chained from the previous step. This text is per language, so it is translated with the rest of the finding.
Only findings you flag appear in the chain. Each card uses the finding's title and severity. Save the step description with the rest of the finding before checking the report preview.
Steps and ordering
Each flagged finding is placed on a step. Steps are numbered in order, and the chain is drawn following that order.
To move a finding to a different position, open it and change the Kill chain step value. The steps are renumbered automatically so they always stay in sequence.
Putting several findings on one step
Sometimes more than one finding belongs to the same stage of the attack. You can place up to three findings on the same step. In a horizontal layout they stack on top of each other within that step's column; in a vertical layout they sit side by side.
To group findings, set the same Kill chain step on each of them. The selector lists the existing steps (with how many findings each already holds) and a New step option:
- Pick an existing step to add the finding to it.
- Pick New step to start a fresh step at the end of the chain.
A step that already holds the maximum of three findings is shown as (full) and cannot take more.